
Net a Fish Upgrades: Nets, Helpers, and Faster Cash
Plan your Net a Fish upgrades with tips for stronger nets, helper upgrades, showcase income, fish fusion, rebirths, and Robux passes before you spend cash.
Jump to
Which Upgrades Should You Buy?
A stronger net won't fix an outdated showcase. Net a Fish upgrades work together: nets and helpers bring in fish, while your showcased catches earn cash every second. Spend toward the part of that loop holding you back.
Use these priorities to decide what to upgrade next:
- Fish are too strong for your net: buy a stronger net rather than spending only on convenience.
- Your showcase still holds weaker catches: open the cooler and use Equip Best before buying anything.
- Your helpers are falling behind: check the Fisherman, Spear Gun, and Boat for affordable upgrades.
- Your rebirth requirement needs more fish: focus on catching rather than increasing cash alone.
Keep the distinction between regular progression and Robux purchases clear. Buying a stronger net through progression and buying the Big Net pass solve different problems: Big Net adds size, while stronger net tiers let you handle fish your current equipment cannot catch.
Official page: Net a Fish (roblox.com)
Upgrade Your Net for the Fish You Want to Catch
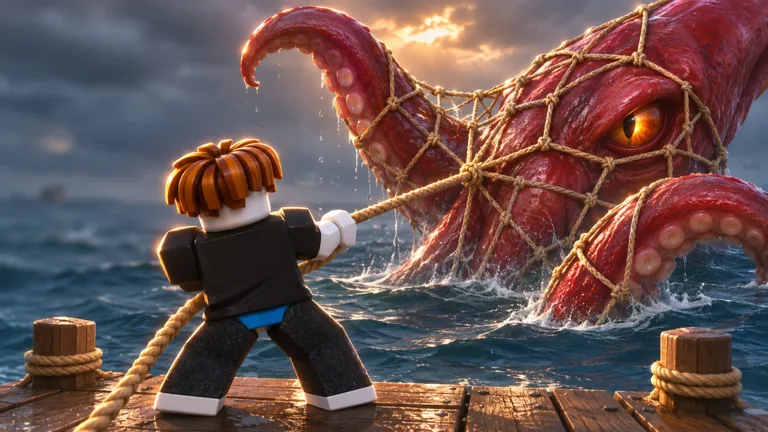
Your net is the center of active fishing. Throw it into the water, let it catch passing fish, and reel it back in to move those catches into the cooler.
 Image: Roblox / UpdatesDev
Capacity and catching strength both matter. A full net limits how many fish you can bring back in that cast, while an underpowered net leaves stronger fish out of reach. More space alone does not address every failed catch.
Check the net upgrade menu when the game announces that a better net is available. Later progression includes nets such as the Ancient Net, with additional net purchases tied to further rebirth progress.
Upgrade for the obstacle in front of you. If a large fish is beyond your current net's strength, prioritize a stronger tier. If the net fills while more fish are passing, inspect the available capacity upgrades.
Bait is another part of this setup. Buy it through the bait shop, then equip or use it through the bait controls. Don't leave newly purchased bait sitting unused while you continue casting.
Turn Better Fish Into Showcase Income
Catching a valuable fish is only part of the job. Your pool showcase earns cash every second from the fish placed in it, so replacing weaker fish directly matters to your income.
Build this routine into your fishing sessions:
- Open the cooler after bringing in new catches.
- Use Equip Best to update your displayed fish.
- Collect the cash generated by the showcase.
- Check duplicates for fusion before selling them.
Repeat the showcase check after a major catch or fusion. Keeping an older lineup displayed means your new fish aren't contributing to that income.
Fuse Duplicates Before Clearing the Cooler
Fusion gives duplicate fish another use. The fusion ladder includes 10 fish becoming Shiny, followed by 8 Shiny becoming Gold.
Compare your duplicates with the fusion requirements before selling a large batch. Then use Equip Best again after fusing to refresh your showcase.
Auto Sell also needs attention as your collection develops. The controls let you select rarity thresholds, including Rare, Epic, and Legendary. Set that threshold around the fish you intend to keep for display or fusion rather than raising it automatically whenever your income increases.
Extra showcase space is a separate purchase. The Extra Showcase pass adds three slots; it does not replace the need to put valuable fish into those slots.
Upgrade the Fisherman, Spear Gun, and Boat
Your net isn't the only thing catching fish. The Fisherman, Spear Gun, and Boat all contribute catches alongside your own casts.
The Boat acts as a fishing helper. Buy and upgrade it for its catching role rather than expecting a boat you steer around the map. Its upgrade controls include the engine.
Check each helper individually when you have cash to spend:
- Open the Fisherman upgrade controls.
- Inspect the Spear Gun upgrades.
- Check the Boat, including its engine upgrades.
Avoid spending every available dollar on one helper without looking at the others. Compare the displayed upgrade costs and effects, then choose the purchase that addresses your current catching needs.
Two paid passes specifically affect this group. Turbo Helpers makes the Fisherman, Boat, and Spear Gun work 50% faster and bring in double the fish. Helpers Luck gives those same helpers 2x luck. Choose between those effects based on whether you want more catches or increased luck.
Check Rebirth Requirements and Spend Skill Points
Rebirth is part of progression into new worlds and bigger rewards. It also connects to the skill tree, where you can spend earned skill points on further upgrades.
Read the requirements before committing your cash to another purchase. Rebirth requirements can involve both money and fish caught, so reaching the cash target does not necessarily finish the job.
If the fish requirement is still short, keep catching and upgrade the systems bringing fish in. Increasing showcase income alone won't complete a separate catch requirement.
Rebirthing resets your money. Check the rebirth screen before making a purchase immediately before the reset, and review your available upgrades afterward.
Visit the skill tree when you have points available. Read each node's effect and spend toward the mechanic you currently need instead of leaving points unused while waiting for cash upgrades.
Compare Robux Passes by Their Actual Effects
Paid upgrades cover automation, showcase income, catching, and fusion. Compare the effect you want before buying; these passes change different parts of your fishing routine.
| Pass | Price | Effect |
|---|---|---|
| Auto Throw | 29 Robux | Automatically casts your net while you are inside your base |
| Auto Collect | 49 Robux | Automatically collects showcase money |
| Big Net | 149 Robux | +50% Net Size |
| Auto Fuse | 199 Robux | Automatically fuses eligible stacks and continues up the fusion ladder |
| Extra Showcase (+3 slots) | 299 Robux | Adds three showcase slots |
| 2x Luck | 349 Robux | Doubles luck for your casts |
| 2x Money | 399 Robux | Doubles money from showcased fish |
| Turbo Helpers | 499 Robux | Helpers work 50% faster and bring in double the fish |
Auto Throw's location requirement matters: it operates while you're inside your base. Auto Collect handles the separate task of collecting showcase earnings, while Auto Fuse processes eligible fish stacks in the cooler.
For income, remember the scope of 2x Money: it doubles earnings from showcased fish. Refresh your displayed lineup so that bonus applies to the fish you actually want earning cash.
Pets offer another route to catches. Ocean and Abyss Crates hatch pets, and the +1 Pet Slot pass costs 399 Robux. It lets you have two pets active together; both hunt fish, and the second pet's money bonus adds to the first. Equip your pets and check your active lineup before purchasing another slot.
Continue with
 Net a Fish Best Net Guide: Upgrades and Robux BoostsFind your Net a Fish best net upgrade path, compare net size and luck passes, and use showcase income, helpers, and rebirths to fund stronger fishing gear.
More in Upgrades

Net a Fish Boats Guide: Cost, Upgrades, and Helpers
Learn how Net a Fish boats work, how to get a 25k boat, how engine upgrades fit into fishing, and what Turbo Helpers and Helpers Luck add to your setup.

Net a Fish Helpers: Upgrades, Boats, and Passes Guide
Learn how Net a Fish helpers work, upgrade your Fisherman, Spear Gun, and Boat, and compare Turbo Helpers with Helpers Luck before spending your Robux.
Continue exploring
Join the community
Official channels for news, updates and player help: